 To donate blood, you must be at least 17 years old, weigh at least 50 kg (110 lb) and be in good general health.
You may not be able to donate blood if you have donated blood in the past 56 days, or if you do not have enough iron in your blood. You can not donate blood if you are pregnant, blood pressure is too high, you take certain medicine, or have certain health problems. If you have traveled to certain countries, or have gotten a tattoo/body piercing in the last 6 months you maybe unable to donate blood.
Also, you should wait 24 hours after a cleaning or filling, and 72 hours if you’ve have dental surgery, a root canal, or a tooth pulled.
The day you are scheduled to give blood, make sure that you get a good night’s sleep, eat a healthy meal before your donation and drink plenty of fluids.
Avoid eating fatty foods, such as hamburgers, because fatty foods can affect the tests that are taken on your blood. If there is too much fat in your blood stream, your donation cannot be tested for infectious diseases and the blood will not be used for transfusion.
Wear clothing with sleeves that can be easily raised above the elbow, and make sure to bring your donor card, driver’s license or two other forms of ID.
Make sure you feel good. Don’t give blood if you feel ill. You shouldn’t donate blood if you feel like you’re getting a cold or the flu.
Once at the blood donor clinic, a health professional will ask about your current and past health to make sure that you can donate. You will be asked questions every time you give blood, because the list of who can give blood may change, or your health may change.
You will also have a brief physical examination, which includes checking your blood pressure, pulse and temperature. A small sample of blood is taken from a finger prick and is used to check the oxygen-carrying component of your blood (hemoglobin level). If your hemoglobin concentration is normal and you’ve met all the other screening requirements, you can donate blood.
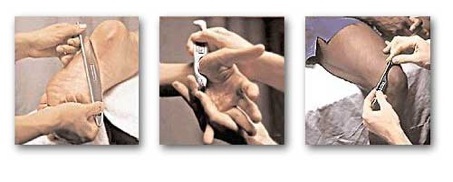
You will be directed to a reclining chair with your arm extended on an armrest. A blood pressure cuff or tourniquet is placed around your upper arm to fill your veins with more blood. This makes the veins easier to see and easier to insert the needle into, and also helps fill the blood bag more quickly.
The practitioner will sterilize the skin on the inside of your elbow, and then will put a needle into a vein on the inside of your elbow. The needle is usually in place about 10 minutes. When complete, the needle is removed, a small bandage is placed on the needle site. While you are donating blood you can relax, listen to music, talk to other donors or read during the donation process.
After donating you sit in an observation area, where you res, eat a light snack and drink either some water or juice. After 15 minutes, you can leave. When you are ready to leave, get up slowly to make sure that you’re not light-headed. If you feel lightheaded, sit back down until the feeling passes.
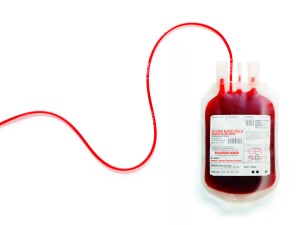
About 400 ml of blood is taken when you donate. It takes about 10 minutes. The whole process—including answering questions and having a short examination—takes up to an hour. After donation, your blood is tested for certain diseases, such as hepatitis B and C, and the HIV virus. Donated blood must pass all of these tests. If any disease is detected, the blood is thrown away and the donor is notified.
Thing to remember when you get home:
Keep the bandage on for the next several hours
Drink an extra four (8 ounce) glasses of liquids and avoid alcohol over the next 24 hours
Eat foods that contain high levels of iron, such as lean red meat, raisins, or beans
Limit your physical activity and avoid any strenuous physical activity for the rest of the day
By following a few recommendations before, during and after your blood donation, you can make your donation experience as safe, successful and pleasant as possible. Keep in mind that whole blood donations are separated into three components: red cells, plasma and platelets. Each component may be given to a different patient. That’s why one donation has the potential to save up to three lives!
 The best approach to healthy eating, is to eat a well balanced diet and eat in moderation; but many of us make the same mistakes; so here are a few tips to keep you on the “right” path.